2003 for a Small Business Network" series. If you've conquered Part 1, then you should have an essentially useless, but ready-to-be-configured, Windows Server 2003 installation. Now it's time to teach it some tricks! Part 2 will help you get Active Directory installed and configured. Along with that, we'll set up DNS, DHCP, and WINS to help everything in the network get on the same page, so to speak.
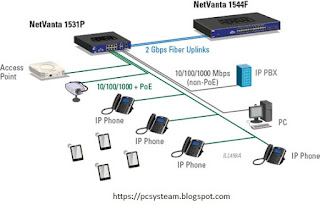
By the end of this article series, we'll have a network like a Figure 1-1.
When we finish Part 2, our server will be ready to have workstations join the domain and start sharing files. Now here we go!
Step 1:
Click the "Start" button, and choose "Manage Your Server" shown in Figure 1-2.You will probably see a "Windows Security Alert" pop-up similar to Figure 1-3. Windows firewall keeps track of programs trying to open network connections. The "Configure Your Server Wizard" should be safe to allow, so click "Unblock."
Step 2:
Now you are presented with the "Manage Your Server" window. Using this handy program, you can configure your server to do many different things. The first of which will be setting up Active Directory. From this screen, shown in Figure 1-4, click "Add or remove a role" so we can add the Domain Controller role.Windows Server 2003 improved on the security of its predecessors by not enabling any services out of the box. If you only enable services you need, you don't have any potential "backdoors" into your system unknown to you. "Adding roles" to a Windows Server 2003 essentially just enables services for network clients.
Step 3:
Next, the "Configure Your Server Wizard" presents two options: "Typical configuration for a first server" or "Custom Configuration." Since this is our first server, we will choose the first option, as shown in Figure 1-5.Now we choose a domain name for our Active Directory tree. A little planning here will definitely pay off later. If you have a domain name for your company now, that's great. You have the option of using your own domain name here. The directions on the screen recommend keeping your domain separately, but I have never had a problem keeping them separate. I will tell you how to do that in later articles when it becomes necessary. Ok, if you don't want to use your own domain name here, you can choose whatever name you want and put .local on the end of it. I recommend keeping it lowercase and less than 15 characters (not including the .local part). I've used testdomain.local in Figure 1-6. If you have any questions about this step, ask in the forums. So enter your domain name and click "Next".
Now you are presented with the NetBIOS domain name selection(Figure 1-7). The NetBIOS domain name is used primarily for compatibility with older operating systems, but it is still integral to the function of Active Directory. If you took my advice in Step 4 about keeping your domain name 15 characters or less, than you should just take the default suggestion here. The example NetBIOS domain name here will be TESTDOMAIN. Click "Next" to continue.
After configuring the NetBIOS domain name, you will come to the "Summary of Selections" window. This window lists the actions that the wizard will perform. It will automatically install a DHCP server and configure a basic scope. I highly recommend using the Win2k3 server for DHCP address assignment on your network. Keep in mind that you only want one DHCP server in most cases. If you have a broadband router or another server doing DHCP, then make sure to disable it. Click "Next" to continue.
The server will now set up DHCP, DNS, and Active Directory automatically. You will see a popup box like Figure 1-8 informing you that the server will reboot after performing the installations. Just press the "Ok" button. If you don't have your Windows Server 2003 disk inserted in your CD-ROM drive, you will get prompted to insert it, so make sure you still have it handy. Next, the server will go through several screens that don't require you to do anything. Just wait till the server finishes and reboots itself. This takes a while, so go get a sandwich or something.
No comments:
Post a Comment